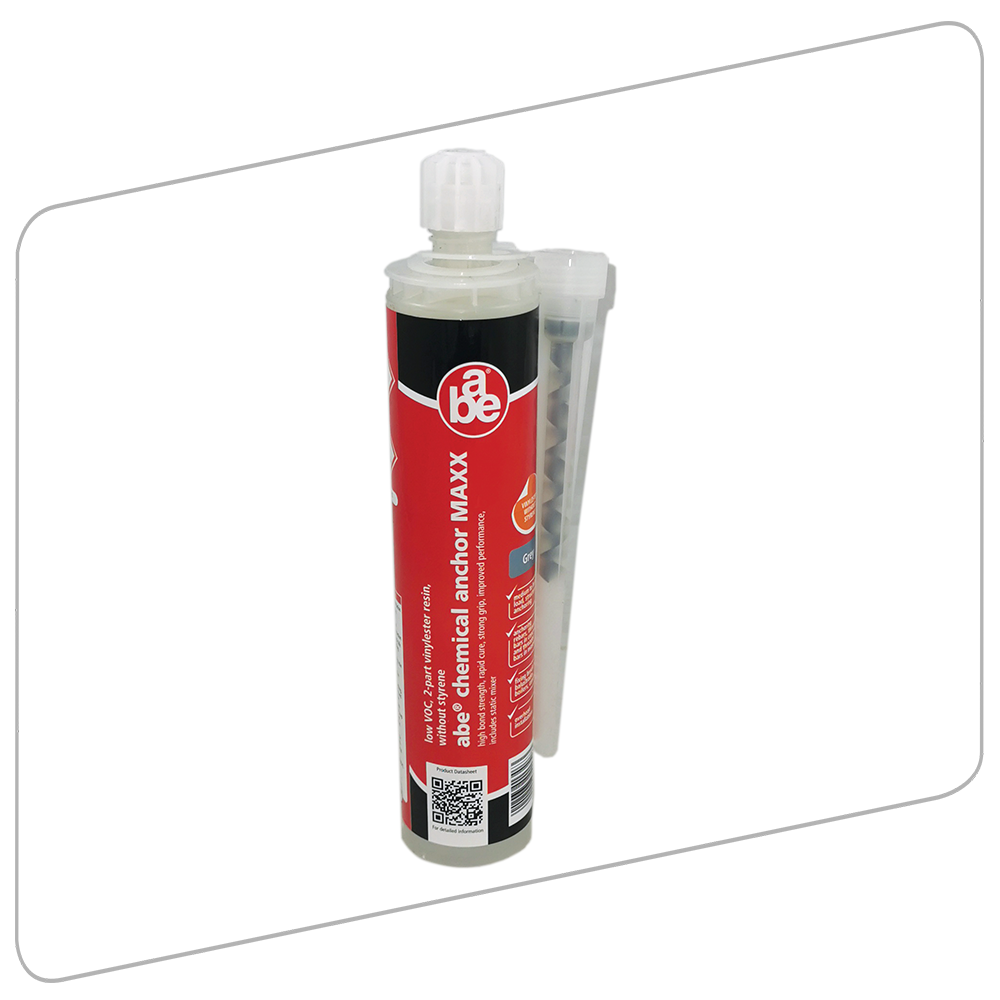
Bonded anchoring system with improved performance for anchoring into solid substrates

abe® chemical anchor MAXX is a bonded anchoring system with improved performance for anchoring into solid substrates. It is suitable for overhead installations, as well as for use in dry, wet and flooded holes. abe® chemical anchor MAXX is vinylester formulated free of styrene, has a very low odor and is ideal for use in confined spaces and indoors.
Uses
- Medium to heavy load, structural anchoring
- Anchoring rebars, threaded bars in concrete and masonry
- Fixing brackets, balustrades, boilers, canopies
- Overhead installations
- Post-installed rebar connections. Studding for heavy-duty fixtures
- In brick, masonry and concrete
- On marble and natural stone
- In hollow and solid materials
NOTE: Use in Porous Substrates
This bonded anchor is not intended for use as a cosmetic or decorative product. When anchoring into porous or reconstituted stone it is recommended that technical assistance is sought. Due to the nature of the product, migration of the monomer in the resin may cause staining in certain materials. If you are still uncertain, it is advisable to test the resin by applying it in a small, discrete area and testing before using the resin on the project.
Advantages
- High performance structural polymer
- Easy and safe system (no trimming, no cutting)
- Stress free anchorsAbsorbs vibrations
- Flexible embedment depths
- Suitable for dry, wet and flooded holes without affecting the load
- Reusable: leave the mixer nozzle on after the application
- Change for a new nozzle before the next application
- Low VOC
- Styrene free
- High bond strength, rapid cure
- Include static mixer
Surface Preparation
Surfaces must be clean, dry, free from grease, dust, loose particles and other contaminants. This is carried out by using a brush and/or oil free compressed air.
Mixing
The resin and hardener are mixed only during extrusion.
Fix the static mixer onto the cartridge and ensure that the extruded product is perfectly mixed (uniform in colour).
This is done by extruding 5 cm of product to ensure that the mix is homogeneous and ready for the application.
Chemical Resistance
Chemical mortar has undergone extensive chemical resistance testing.
The results are summarised in the table on the datasheet.
Application
Solid Substrate Installation Method
1. Drill the hole to the correct diameter and depth. This can be done with either a rotary percussion or rotary hammer drilling machine depending upon the substrate.
2. Thoroughly clean the hole in the following sequence using a brush with the required extensions and a source of clean compressed air. For holes of 400 mm or less deep, a blow pump may be used:
Blow Clean x 2 / Brush Clean x 2 / Blow Clean x2 / Brush Clean x 2 / Blow Clean x 2.
If the hole collects water, the current best practice is to remove standing water before cleaning the hole and injecting the resin. Ideally, the resin should be injected into a properly cleaned, dry hole.
3. Select the appropriate static mixer nozzle for the installation, open the cartridge/foil pack and screw nozzle onto the mouth of the cartridge. Insert the cartridge into a good quality applicator.
4. Extrude the first part of the cartridge to waste until an even colour has been achieved without streaking in the resin.
5. If necessary, cut the extension tube to the depth of the hole and push onto the end of the mixer nozzle, and (for rebars 16 mm dia. or more) fit the correct resin stopper to the other end. Attach extension tubing and resin stopper.
6. Insert the mixer nozzle (resin stopper / extension tube if applicable) to the bottom of the hole. Begin to extrude the resin and slowly withdraw the mixer nozzle from the hole ensuring that there are no air voids as the mixer nozzle is withdrawn. Fill the hole to approximately ½ to ¾ full and withdraw the nozzle completely.
7. Insert the clean threaded bar, free from oil or other release agents, to the bottom of the hole using a back and forth twisting motion ensuring all the threads are thoroughly coated. Adjust to the correct position within the stated working time.
8. Any excess resin will be expelled from the hole evenly around the steel element showing that the hole is full.
This excess resin should be removed from around the mouth of the hole before it sets.
9. Leave the anchor to cure. Do not disturb the anchor until the appropriate loading time, has elapsed depending on the substrate conditions and ambient temperature.
10. Attach the fixture and tighten the nut to the recommended torque. Do not overtighten.
(See technical datsheet for images)
Hollow substrate installation method
1. Drill the hole to the correct diameter and depth. This should be done with a rotary percussion drilling machine to reduce spalling.
2. Thoroughly clean the hole in the following sequence using the correct brush with the required extensions and a source of clean compressed air. For holes of 400 mm or less deep, a Blow Pump may be used: Brush Clean x1. Blow Clean x1.
3. Select the appropriate static mixer nozzle for the installation, open the cartridge/foil pack and screw nozzle onto the mouth of the cartridge. Insert the cartridge into a good quality applicator.
4. Extrude the first part of the cartridge to waste until an even colour has been achieved without streaking in the resin.
5. Select the appropriate perforated sleeve and insert into the hole.
6. Insert the mixer nozzle to the bottom of the perforated sleeve, withdraw 2-3 mm then begin to extrude the resin and slowly withdraw the mixer nozzle from the hole ensuring that there are no air voids as the mixer nozzle is withdrawn. Fill the perforated sleeve and withdraw the nozzle completely.
7. Insert the clean threaded bar, free from oil or other release agents, to the bottom of the hole using a back and forth twisting motion ensuring all the threads are thoroughly coated. Adjust to the correct position within the stated working time.
8. Any excess resin will be expelled from the hole evenly around the steel element showing that the hole is full. This excess resin should be removed from around the mouth of the hole before it sets.
9. Leave the anchor to cure. Do not disturb the anchor until the appropriate loading time, has elapsed depending on the substrate conditions and ambient temperature.
10. Attach the fixture and tighten the nut to the recommended torque. Do not overtighten.
(See technical datsheet for images)
Using With Threaded Rods In Uncracked Concrete
The results are summarised in the table on the datasheet.
Working & Loading TImes
The results are summarised in the table on the datasheet.
Threaded Rods - Characteristic Values For Steel Failure (Tension)
The results are summarised in the table on the datasheet.
Installation Parameters - Threaded Rods
The results are summarised in the table on the datasheet.
Splitting Failure
The results are summarised in the table on the datasheet.
Tension load calculations for combined pullout and concrete cone failure at various embedment depths using threaded rods in dry/wet,
C20/25 uncracked concrete (Temperature Range: -40 °C to +80 °C)
Threaded Rods - Characteristic Values For Steel Failure (Shear - Without Lever Arm)
The results are summarised in the table on the datasheet.
Post Installed Rebar Conncetions - EAD 330087-00-0601 (OLD TR023)
The results are summarised in the table on the datasheet.
Threaded Rods - Characteristic Values For Steel Failure (Shear - With Lever Arm)
The results are summarised in the table on the datasheet.
Installation Parameters For Post-Installed Rebar Connections
The results are summarised in the table on the datasheet.
Design Bond Strength Values - Hammer Drilled Or Compressed Air Drilled Holes
The results are summarised in the table on the datasheet.
Installation Parameters In Solid & Hollow Masonary
The results are summarised in the table on the datasheet.
Edge Distancing And Spacing
The results are summarised in the table on the datasheet.
Characteristic Resistance Under Tension And Shear Loading
The results are summarised in the table on the datasheet.
Characteristic Bending Moment
The results are summarised in the table on the datasheet.
Displacements Under Tension And Shear Load
The results are summarised in the table on the datasheet.
Factors For Job Site Tests According To TR 053
The results are summarised in the table on the datasheet.
Types & Dimensions of Blocks and Bricks
The results are summarised in the images on the datasheet.
Cleaning
Clean tools immediately after use, before material has set with abe® super brush cleaner, followed by washing with soap and water. The cured product can only be removed mechanically.
Caution
- Causes serious eye irritation
- Causes skin irritation
- May cause an allergic skin reaction
- Wash the skin thoroughly after handling
- Wear protective gloves and protective clothing, eye protection and face protection
- If on skin: Wash with plenty of soap and water
- If in eyes: Rinse cautiously with water for several minutes. Remove contact lenses, if present and easy to do. Continue rinsing and seek medical advice
- If skin irritation occurs: Get medical advice / attention
- Take off contaminated clothing and wash before reuse
- Contains: Benzoyl peroxide
- Keep out of reach of children
Colour
Grey
Volume / Size
300 ml
Handling & Storage
abe® chemical anchor MAXX has a shelf life of 12 months from production date if kept in the original container in a cool, dry place (temperature < 25ºC). In more extreme conditions this period might be shortened.
Health & Safety
Product safety information required for safe use is not included. Before handling, read product and safety data sheets and container labels for safe use, physical and health hazard information. The safety data sheet is available from your local a.b.e.® sales representative.
Important Notice
This data sheet is issued as a guide to the use of the product(s) concerned. Whilst a.b.e.® endeavours to ensure that any advice, recommendation, specification or information is accurate and correct, the company cannot accept any liability for application – because a.b.e.® has no direct or continuous control over where and how a.b.e.® products are applied.
Further Information
Where other products are to be used in conjunction with this material, the relevant technical data sheets should be consulted to determine total requirements.
a.b.e.® has a wealth of technical and practical experience built up over the years in the company’s pursuit of excellence in building and construction technology.
